I believe this is it, then to a long drawn out battle between my laptop and me. I didn't want to accept it at first, I didn't want to believe that the problem was the drive, but it was. Ever since I made the disk drive upgrade to my Macbook, I was having consistent freezing, disk i/o errors, as well as data underrun error being reported in the console. I would really like to thank Scott and Mike at iFixit for trying their best to help me. They sent me a new caddy, even a new drive adapter. And even though that did not fix the problem, the fact that they made the attempt to fix it really is amazing. They are the best customer service I have ever dealt with in a long time. I had never dealt/bought from iFixit prior to this, but that didn't matter. No matter what, they were determined to aid me with my issue.
So what was the problem in the end? The problem is that the Caviar Black 7200 RPM I bought was too fast. Simply put, when the data had to be converted from SATA to ATA, the disk would be moving to fast for the computer to handle. This would cause the data to "bottleneck" in the conversion area, thus slowing down my computer. How am I so sure this was the issue? To find out, I took an old 5400 RPM drive that I had, which is failing but still works, and popped it in the bay. I am writing to it, reading from it, and not seeing as many disk i/o errors in my console. There are still a few showing up in the console, but they are not enough to slow the computer down. Because of this, I now have to make another transaction. I will now have to go to Amazon and request an exchange for a slower Caviar Black drive, as well as pay the difference for the drive. This just goes to show that you can't rule out the most obvious option right away.
~Dave

Showing posts with label Storage Devices. Show all posts
Showing posts with label Storage Devices. Show all posts
Monday, September 12, 2011

Tuesday, July 26, 2011
Why I am Waiting for a Windows SSD
In recents months SSD prices have been dropping to the point where I am considering buying one for Windows. I came very close to buying some of them, but then I strayed away. The reason being is that all the current drives that are SATA III are having issues with Windows. Many of the newer drives are having problems where they randomly get a Blue Screen of Death. This is a huge no buy point for me, as I don't wish to deal with any issues. I keep looking, but at the moment there only seems to be one drive that doesn't have any issues, and that is the Patriot Wildfire. With no issues, and comparable speeds, it is the drive worth buying. However, with a price point of $300 I am not ready to buy that yet. For 120GB I would like less then $200 to be spent on the drive. Until these issues are fixed, or this drive drops in price, I will be waiting to buy a SSD for Windows. Plus, I have no issues at the moment with my 1 TB Caviar Black drive.
~Dave
~Dave
Saturday, July 23, 2011
Optimizing an SSD for Lion
TRIM
First and foremost, the one thing you must do after installing Lion is run Trim Enabler. What this does is enable the trim feature for your SSD if it is a non-Apple certified one (e.g if you bought something like an OCZ or a Corsair drive). Without trim enabled, you will wear down your SSD faster because the SSD will have to re-write information a lot more. What trim does is when you delete a file it is completely removed from the memory block. However, without trim, the SSD will think the file is not in the memory block, even though it still is. That means that when a new file has to be written, the no trim SSD will have to delete the old file and write the new one, where the trim SSD just has to write the new one.
HIBERNATION OFF
When OS X goes to sleep normally, it uses hibernation mode. This is ok on a HDD as you have a ton of space. However, on an SSD you don't have a ton of space and every byte counts. When hibernation mode is enabled, your computer will write all the contents of your RAM to your SSD. That means if you have a total of 8 GB or RAM, it will be written to your SSD. That is a lot of space to lose to RAM. We want to turn this off, so go ahead and open up Terminal.
HARD DRIVE SLEEP
By default OS X enables the command to put your hard drive to sleep when inactive. However, SSDs don't need to be put to sleep. Some even are known to freeze up when put to sleep. To disable this, simply go to System Preferences->Energy Saver and disable it. If you are on a laptop, make sure to disable it for both with and without the power adapter.
SUDDEN MOTION SENSOR
Another feature that is Hard Drive specific. This feature prepares a HDD for impact if it detects the computer falling suddenly. The features will disengage the hard drive head and stops the disks from spinning. With an SSD however, there are no moving parts, so this command is useless. To turn it off, type the following code into Terminal:
DISABLE SPOTLIGHT
If you don't search your computer a lot, then you have not reason to let spotlight index your computer. Simply turn it off by typing the following into Terminal:
I hope these tips help you out there who wanted to optimize your SSD for Mac.
~Dave
First and foremost, the one thing you must do after installing Lion is run Trim Enabler. What this does is enable the trim feature for your SSD if it is a non-Apple certified one (e.g if you bought something like an OCZ or a Corsair drive). Without trim enabled, you will wear down your SSD faster because the SSD will have to re-write information a lot more. What trim does is when you delete a file it is completely removed from the memory block. However, without trim, the SSD will think the file is not in the memory block, even though it still is. That means that when a new file has to be written, the no trim SSD will have to delete the old file and write the new one, where the trim SSD just has to write the new one.
HIBERNATION OFF
When OS X goes to sleep normally, it uses hibernation mode. This is ok on a HDD as you have a ton of space. However, on an SSD you don't have a ton of space and every byte counts. When hibernation mode is enabled, your computer will write all the contents of your RAM to your SSD. That means if you have a total of 8 GB or RAM, it will be written to your SSD. That is a lot of space to lose to RAM. We want to turn this off, so go ahead and open up Terminal.
Note: The $ sign is not required as part of the code.And that is it, you will now have no hibernation on your computer!
1. In Terminal type the following:
$ sudo pmset -a hibernatemode 0
This will then turn off hibernation.
2. Next we have to remove the old file (you may not have a file to remove if you just installed Lion and haven't put your computer to sleep yet). To remove the file type into Terminal the following:
$ sudo rm /var/vm/sleepimage
HARD DRIVE SLEEP
By default OS X enables the command to put your hard drive to sleep when inactive. However, SSDs don't need to be put to sleep. Some even are known to freeze up when put to sleep. To disable this, simply go to System Preferences->Energy Saver and disable it. If you are on a laptop, make sure to disable it for both with and without the power adapter.
SUDDEN MOTION SENSOR
Another feature that is Hard Drive specific. This feature prepares a HDD for impact if it detects the computer falling suddenly. The features will disengage the hard drive head and stops the disks from spinning. With an SSD however, there are no moving parts, so this command is useless. To turn it off, type the following code into Terminal:
sudo pmset -a sms 0
DISABLE SPOTLIGHT
If you don't search your computer a lot, then you have not reason to let spotlight index your computer. Simply turn it off by typing the following into Terminal:
sudo mdutil -a -i off
I hope these tips help you out there who wanted to optimize your SSD for Mac.
~Dave
Friday, July 8, 2011
Synchronous and Asynchronous
So yesterday I was browsing through some SSDs on the market, and I came across the new Force GT by Corsair. I then had the urge to read up on their website what made this drive different then the other drives out. The Force GT has a Synchronous NAND chip, unlike drives like the Agility 3 or Solid 3 which have Asynchronous NAND chips. What the heck did that mean? Well Synchronous NAND is a very organized way of sending information. Imagine information is lined up in a long line, Synchronous NAND tells the information to go one at a time, but at a very fast and organized pace. Now imagine you have that same line, but with an Asynchronous NAND. It would just tell the entire line to go at once. You still get fast speeds on both drives, but one drive will be more efficient in the way it transfers data. This not only aids in having a better life span, but also allows you to have to worry a little less about wearing out the parts in your SSD. As your probably know by now, SSDs have a death rate of about a year and a half to two years depending on how much information you read and write to it. This is one of those small things you should research about your drive before buying it, who knows, it may save you a little money and data.
~Dave
~Dave
Wednesday, July 6, 2011
Another great experience
When it comes to customer service, it is hard to be motivated to call them up. Most of the time they can be little or no help. However, when I called OCZ's customer service, I had a very helpful man. The man knew what he was talking about and was glad to assist me. The reason I had placed the call was because the 60 GB Agility 3 I had bought did not come with a 2.5" mounting bracket like it was suppose to. Even though I had an extra, I wanted to notify the company of this bad quality of packaging. Someone is suppose to make sure that all the parts are with the drive before it ships, and since mine did not come with all the parts I will be filing a small complaint as well as requesting a replacement for that part. Unfortunately I couldn't do that over the phone, so today I will be filling out a suppose ticket. The ticket will allow me to get a replacement part.
Next on my agenda was asking the customer service rep about the issues I had been reading about regarding SSDs. Recently, there have been many reports on OCZs forum of issues regarding their Agiltiy 3 and Vertex 3 drives. Most people say it is firmware related, but you can never be sure. The issues would include Blue Screen of Death (BSOD), lock ups, and freezes of the Window OS. I asked the rep if this problem was really as rampant as it was made out to be. He responded by assuring me that this problem is very minuscule, and most likely is a result of a driver issue for some people. If this is really the case, then I should have no problem when looking at a purchasing a 120 GB drive for my Windows OS. This is what good customer service is all about.
~Dave
Friday, July 1, 2011
One SSD Down, One to Go
As I mentioned earlier this week, I picked up an Agility 3 for my hackintosh to run Lion on. However, I still need a SSD for Windows to run on. The downside to this is that I want Windows to run on a 120 GB drive, not a 60GB drive. Windows is much larger then Lion and will expand in size as it updates. So you may think "No problem right? Just go buy a drive". My issue is that many of the new drives are reporting problems with Windows, many of which are blue screen of death issues. Corsair, for example, had a recall just weeks ago because their drives were faulty. OCZ on the other hand is just putting out firmware updates, but insists there is nothing wrong with the drives. The issue for me is this: There is a sale this week putting the 120 GB drives below $200. This is the price that I am willing to pay, however it is risky to buy if there are issues. Many people insist that if you have issues, use your three year warranty and trade in the drive. Again, I have no issue with this, it is just that doing that requires me to uninstall the drive, wait for the new one, and then ship the old one out. However, think of this scenario: I have to ship out three or four SSDs because they are not working, that will mean days of no Windows drive. That would seriously hurt my gaming ability. Out of all the drives that are currently on sale, I am considering the OCZ Solid 3 as it seems to have the least problems.
~Dave
~Dave
Thursday, June 30, 2011
New Time Capsule

~Dave
Wednesday, June 29, 2011
SSD Upgrade
 |
| Image from OCZ |
~Dave
Thursday, April 14, 2011
Sata III
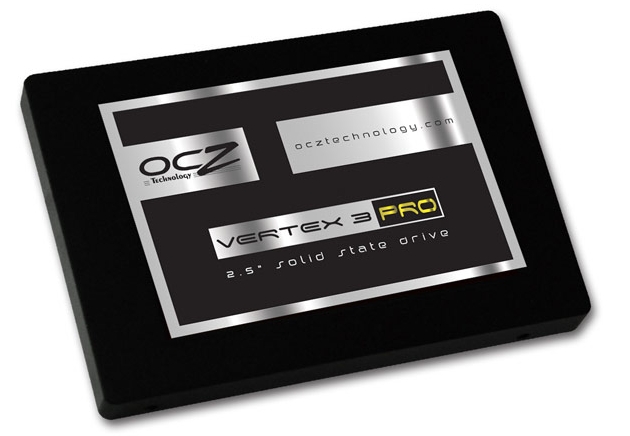
For some time now I have been considering upgrading to an SSD (Solid State Drive). If you don't know what a solid state drive is, have a look at my article on solid state drives vs. hard drives. So it would seem real simple to just go out and buy an OCZ Vertex 2 and be done with it. However, there is one thing which is stopping me. SSDs are now moving to 6GB/s SATA, also known as SATA III. The difference between SATA III and SATA II are the speed, SATA III is much faster. The reason I don't buy SATA III drives is because I don't have any SATA III ports on my motherboard. I can't upgrade my motherboard because I am running a hackintosh, and because my Intel chip is an LGA 775 socket. Support for the LGA 775 socket is going away fast because it is old technology. So what do I do? Well, thanks once again to Reddit I have a solution. I asked Reddit if there was a way I could get these SATA III ports that I needed in some sort of expansion slot or something. As I was hoping, there is a way.
I was shown this Highpoint expansion card. This card allows me to have two SATA III ports on my motherboard. Well, not exactly on it, it is an expansion card. My hope is that in the future I will be able to buy an OCZ Vertex 3 SSD along with this expansion card. This would allow me not only to use the Vertex 3, but get close to the maximum speed I can out of it. I might even get another Vertex 3 when Lion comes out since it supports trim. These are just plans for the future, hopefully they will come true. If I had the money for this stuff right now, I would probably get those items.
~Dave
Tuesday, March 22, 2011
Purging an Old Drive

I have a hard drive which is failing, however it still has data on it. This drive is a good three or four years old, it was installed in my Macbook when I bought it. I had to remove it from there when I noticed the "S.M.A.R.T" Status indicated it was failing. When I removed it, I was left with a drive that had data on it which needed to be removed. I am not one for just a simple erase. I decided to be careful and do a 35 pass erase. This means that the needle goes around the disk 35 times completely to erase any and all traces of data.
35 times may not seem like a lot, but it is. As of now, I am up to my 17th time around the disk. My hackintosh has been running for almost two days now erasing the disk. This method, the 35 pass wipe, is the most secure method out there. I did learn recently though, if your disk warped over time there may be sections of it that are unreadable. That means that the needle won't go over and over and erase it. There are two option that post the best measure of security if you don't want to wipe your drive. First, take an axe to it and have fun destroying it. Second, rub a strong magnet over it. Doing so will mess up the ones and zeroes on the disk; thus, the disk will now have corrupt data on it instead of data which is retrievable.
Not everyone needs to clean their old drives, but since this one is out of warranty I want to make sure there is nothing left on it before I destroy it. You can never be too safe when destroying data.
~Dave
Friday, January 21, 2011
Looking for Yet Another Drive

After reading Lifehacker's Guide to "The Portable Hackintosh", I decided it would be worth a try. So now I am back in the market for a 16 GB flash drive. After reading around, and asking a few questions, I have acquired some information that will help me in my quest.
1. Buy Sturdy: You want a good encasing, not something that will break easily.
2. Good Key Ring: Should fit nicely on a key ring for easy access.
3. Don't Buy from Best Buy: I am in no way telling you not to, but it was said in all the places I was looking. The people said that Best Buy over charges.
4. Shop Online First: Don't just go into any store without researching, make sure you have shopped online first. There is a good chance that it will be on sale on a website, or just cheaper, then in stores.Doing this can save you money, and get a great deal on flash drives. It may be time, if you haven't already, to upgrade to a better flash drive. Floppy Disks are a thing of the past, and 1 GB of memory is the minimum now. If you use less then that, or use a Floppy Disk, I suggest upgrading.
~Dave
Tuesday, December 14, 2010
Out Comes 1 TB 2.5"

Seagate, Western Digital's post popular competitor, has put its foot into the hard drive market again. They have announced their 1TB 2.5" drive. Now, this drive is different then the drive that Wester Digital announced last year. This one is much faster. It spins at 7200 RPM and has a transfer rate of 6 GB/s, compared to Western Digital who's Scorpio Blue has 5400 RPM and a transfer rate of 3 GB/s. The drive, known as Constellation, is targeted more for the desktop user. It has a lifespan of 1.4 million hours, that is 2 million more then the previous drive. When compared to its older brother, the 3.5" version, it has 72% more power saving while idle then the older brother. The drive itself is aimed at the business market more then the consumer market. The drive also comes in sizes of 250 GB, 500 GB, and this 1 TB model. It also comes built with data encryption, keeping your data safe and secure. Most likely Western Digital will respond to this drive in the coming months with a drive of their own. We will see.
~Dave
Saturday, November 27, 2010
Speeding Up Windows 7: Keep it Fast PT1
In the past I have mentioned tid-bits here and there about how to speed up your computer. I did some intense research over the past few days and found there are small things you can do within Windows 7 to increase performance and speed. Most of these things also work on Windows XP.
Defrag
First thing you want to do is to defrag your computer once every couple of months. This helps to keep your disk information all sorted and tied together, no lose ends. You can read more about this in my previous article.
Aero-Off
Windows 7 comes with the very beautiful Aero Theme, which at the same slows your computer down immensely. By turning this off, you will gain a significant speed boost. To do this, click on the "Start Menu" and then right click on "Computer"--->Properties. In the new window that appears click on "Advanced System Settings". You will get a new window that looks like this:


Defrag
First thing you want to do is to defrag your computer once every couple of months. This helps to keep your disk information all sorted and tied together, no lose ends. You can read more about this in my previous article.
Aero-Off
Windows 7 comes with the very beautiful Aero Theme, which at the same slows your computer down immensely. By turning this off, you will gain a significant speed boost. To do this, click on the "Start Menu" and then right click on "Computer"--->Properties. In the new window that appears click on "Advanced System Settings". You will get a new window that looks like this:

Continue by clicking on the "Advanced" Tab and then click on Settings under Performance. In the box that pops up you will see options related to the Aero Theme. Click on the one that says "Adjust for best performance". When applied, all of the Aero Theme will be turned off and your computer will look like it is on Windows 98. Before closing that window, one more thing you should do.Click on the "Advanced" tab and in the first box, the one that says "Allocate System Processes", choose Programs and click apply. By now you should be seeing a much needed speed boost.
Explorer.exe
The explorer.exe is what manages control over your taskbar and desktop. We want to make sure it is running at the best speed so we get the best performace. To get to it, open up the Task Manager and click on the "Processes tab. Seen below:

Locate the process "Explorer.exe" and right click on it. In the menu that drops down you will see a choice named "Set Priority". Click on that and choose "Realtime". This will make sure that your taskbar is the main focus of the processor. If it sets the priority to "High", that is ok.
Power Performance
If you are on a laptop. I don't recommend changing this setting as you will have to charge more often.
Open up the control panel and choose "Power Options". You will now have a window that looks like this:

Select "High Performance" from the available options. Now, when I did this it worked the only problem was I had trouble putting my computer to sleep. So, I went and edited the configuration (Change Plan-->Advanced Options) of "High Performance" and under Sleep I turned off "Allow Hybrid Sleep".
Upgrading your Drive and Ram
If you have the money to spend, upgrading your internal drive and your ram will make a huge difference in speed. Upgrade your HDD to an SSD, more information can be found here.. SSD are much faster and will make a huge difference. Also, upgrading your RAM is very important. In my opinion, 4GB of RAM is the standard today. If you don't have 4GB, I suggest you upgrade to that first. You can always have more, just make sure to check how much your motherboard can hold. Mine, for example, can't hold more then 16GB of RAM.
Start Up Apps and Services
I have mentioned this before, having applications start up will slow down your boot time greatly. What I am going to add is how to disable ones you may not know are there. Open up "Run". It is located in the Accessories folder in the start menu. Once open, type "msconfig", this stands for Microsoft Configuration. You will get a window that looks like this:

Looks a little scary, I know, don't worry
Select the "Start Up" tab. In this tab you will see all the applications that start up when you start your computer. Go through unchecking the ones that you don't want. For example, I didn't want iTunes or Quicktime to start up, so I uncheckedt them. The less you have on start up, the faster your computer will load. Also, if you don't know what it is either google it or don't change it. Next, head over to the "Services" tab.There are many items here, and although it seems overwhelming, there are some in there that we don't need.. Only turn off the ones you know! In my case, I turned off Fax, iPod Services, Remote Registry, Secondary Logon, Remote Desktop Configuration, Tablet PC Input Services, Parental Control, and Remote Desktop Services. I went and looked up some of these before I turned them off. Once you are done you can hit Apply, but don't close the window just yet, we will need it in our next step.
Boot Up
While still in msconfig, click on the Boot tab.There is a small section that says "Time out", it is most likely set to 30. Set that to 3, this will make your boot much faster as it times out quicker.
Keeping it Clean
Other then Defragging, mentioned above, we have temporary files that need to be dealt with. Open up "Run" again and type "cleanmgr.exe". An application will then open related to disk cleaning. It may ask you to select a drive, select the one with your OS on it, most likely the C: drive. It will then scan your computer for what needs to be emptied.

cleanmgr.exe window
Now, from here we want to select everything except "Setup Log Files" and the System/Per User Error Reports. Once done click "OK" and it will proceed to clean out these files. You will want to do this at-least once a month to keep you computer running fast.You can also use google as there are applications that can assist you with this, one example being CCleaner.
This will end part 1 of this article, part II will be out tomorrow. I didn't want to make it a huge wall of text, that is no fun. Check back tomorrow for part II!
~Dave
Wednesday, November 24, 2010
Custom USB Flash Drive - Bulk, Promotional, Wholesale, Branded USB Flash Drives
Custom USB Flash Drive - Bulk, Promotional, Wholesale, Branded USB Flash Drives. I recently discovered this website while surfing the web. I was really impressed with not only the selections of drives, but the ability to create your own USB flash drive. It is the perfect time to order a customized one too, because it is just in time for the holidays. From what I understand, you can create a design, and send it to them. They will then create a flash drive custom fit to your design. So, if you wish to spell out someone's name for their holiday gift, you can! I personally would like a 1x1 scale of a floppy drive which, when you slide the little metal piece on top, slides out the usb stick to connect to the computer. Just a little tid-bit before the holidays. I hope everyone has a happy Thanksgiving, there will be no update tomorrow.
~Dave
Wednesday, November 17, 2010
Slowly Transfering
Recently, I have been looking for ways to get some space back on my computer. I have been deleting old files that I don't need, uninstalling unused programs, and organizing stuff. One of the things I started to do was to put some stuff on Dropbox. So what kinds of things have I moved onto Dropbox? Well, I have been moving items from my documents folder to it. It is really useful in the event I need a document, and assuming I have internet, I can access that document from anywhere. As I trim the size of my home folder down on my computer, I may move more and more of it to Dropbox. The only thing which will give you issues is iTunes. If you try and move your iTunes library to Dropbox, you will encounter a problem. iTunes will have and issue reading your library. Although there are many work arounds out there, I think I will just wait. I have the feeling Dropbox will incorporate it eventually into their program; thus, making it easier to use. Dropbox is hands down one of the best applications out there, and you should definitely sign up if you haven't already.
~Dave
~Dave
Thursday, October 21, 2010
Old Hard Drives
Ever wonder what to do once your hard drive dies? Some may say the best thing is to just throw it away. Others say, wiped the data clean then throw it away. Well, I say don't do either of those things, because no matter what method you use to wipe your hard drive, the information will still be there. What you want to do is grind that drive to a pulp. Open it up and take out the CD. Then break it in any way you wish. You want that disk so broken that even the world's greatest puzzle solvers can't put it together. The reason for this, in case you are wondering, is that once you burn information to a HDD, it is never fully gone, no matter what you do. So if you are doing loads of tax work on your HDD, that will be saved. This is why you don't want to just toss away your drive. Although wiping it does delete most of the information, it is still there, just a little harder to get to. For this reason, it best to have some fun and destroy your dead hard drive any way you wish.
~Dave
~Dave
Sunday, September 12, 2010
Localized, External, or Online?
Many people now are starting to keep their information stored online, and others tend to keep theirs on their computer. Some even keep their items on an external drive. Then the question arises, is it better to store your documents online,externally, or on your hard drive? All have their pros and cons. For example, storing your information online is great, you can access it from any computer (with internet) and it doesn't take up space your drive. On the other hand, storing online can also be a security risk. If, for what ever reason, the server you store your information on is compromised, you could lose important data. Yet, if you store on your hard drive, it takes up space, slows down your computer, and cannot be accessed from other computers. However, you don't have to worry about security as much compared to storing online. And then there is storing on an external device, such as a USB stick,ESATA (external SATA drive), or USB Hard Drive. In the event that your hard drive is compromised, or fails, you have all your data on an external device. Plus, depending on the type of external device, you can take your files where ever you go. However if you lose your external drive, or something goes wrong you lose the data. All have their pros and cons, and for this reason I suggest utilizing all three, so there is always some back up. Leave a comment listing which one you like to use!
~Dave
~Dave
Friday, September 10, 2010
All Fragged Up
Is your computer running slower than it should be? If you are constantly downloading and deleting things, you will most likely notice a significant decrease in speed. The reason for this is because of how Windows deals with file management. Say you have 3 files, x,y,z, and you delete one of them and then download a new file. That new file will take the space of the deleted file, so your files would be arrange on the disk as x,a,z. This makes it harder for the disk to read the files since they are out of order. This is known as fragmentation, easy way to remember that is because you have fragments of information every where. What needs to be done is a defragmentation. This can take a LONG time, so I suggest you give yourself a WEEKEND to do it just in case. Defragmenting takes all that messy, out of order, discombobulated information, and tidies it up. This in turn allows your hard drive to find the information faster, and makes everything run much smoother. To defrag your computer, first click on the start menu-->right click on "Computer"-->Right click on the disk you want to check-->Properties--> Tools. This will bring up a window with three options, the middle one being defrag. Click on it and it will open another window. This will show you all the disks that can be cleaned up, which most likely will be only one unless you have multiple hard drives with Windows installed. First, you will need to select the disk you want to defrag, then click "Analyze". This will scan your disk and see what percentage of it is fragmented. Once that is done, make sure you have everything closed on your computer, don't have other programs open. Don't download anything or install anything either. Once you are ready, click defragment. Your computer will then start cleaning up the disk. Leave your computer on and let it do its thing. Check in on it every hour or so to wake it from sleep and make sure everything is running fine. When I did this on my computer, my disk was 8% fragmented, and it took me about 4 hours to defragment that. So if you have more then that, depending on your hardware, it may take a while for you to finish. However, once done the speed your will gain will have made it all worth doing. Please, feel free to leave a comment if this helped you or not.
~Dave
~Dave
Tuesday, September 7, 2010
Drop Your Files in a Box
Why carry a USB stick, when all of your files can be stored online in a secure account and be accessed from any computer? There is no need to carry small USB sticks anymore, thanks to an awesome website call Dropbox. Dropbox is a free site that allows you store what ever you would like in an account online. The account gives you 2GB of storage for free. Of course there are pay per year accounts if you wish to upgrade, but honestly I don't think you will need to. Plus, you gain space for inviting friends to Dropbox, and can increase your space amount to a maximum of 8GB. You are also notified of any changes made to your account if you download the Dropbox application. So, what are you waiting for? Sign up for DropBox now!
~Dave
~Dave
Tuesday, August 24, 2010
Breath Life into an Old Machine
Got an old PC/Mac not being used? Is it slow and you don't want to use it because of it's speed? Well here is a way to fix that. I recently decided to breath life into my old iMac G5. It already had the max amount of RAM, but the hard drive was five years old. The HDD works fine, it is just very slow. So I decided it was time to upgrade. I bought a 60 GB SSD from OCZ through Newegg's Shell Shocker deal, it was a really good price. Remember to keep an eye on those deals! Now, since my iMac was so old, I needed to buy something called "IcyDock 2.5-3.5 SSD Converter". This is a small black box that will house the SSD, and it will also fit where the HDD would go. I needed this because I couldn't put a mounting bracket in my iMac. Before doing anything, I backed up all my information from my HDD to an external drive. This way, incase anything went wrong, I had all my files backed up. After receiving my SSD, I took out my old hard drive, and put my new SSD in with the IcyDock encasing around it. Then, I booted up the machine and inserted the installation disk that came with my computer. Before I did anything within the installation program, I went to "Utilities" and then opened up "Disk Utility". I then proceeded to format my new SSD so that OS X could be installed. I closed Disk Utility and then ran the installer. It only took about 15-20 minutes to install everything! My iMac is now much faster. Next I have to upgrade the OS to Leopard (it came with Tiger), but that is for another post. If you have a PC, you can do the same thing. However, PCs are more versatile and allow you to do much more then just the HDD replacement/upgrade. You can also upgrade your CPU/Processor, RAM, Graphics Card, and any other peripherals. So before you decide to throw out that old computer, consider upgrade some parts and make it last even longer!
~Dave
~Dave
Subscribe to:
Posts (Atom)